Showing posts with label fabric. Show all posts

Monday, September 20, 2010

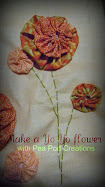
fabric rosette hairbow tutorial


Have you seen the fabric hair bows that are starting to gain some popularity?


Well they are so easy to make.....Easy Peasy in fact!


Start with the fabric you want to use....just about any fabric will work, but if it's shear and thin, plan on possibly getting some hot glue gun burns later on ;-) This sample is cotton.


Rip a strip of fabric, this is the width of the fabric, and I didnt use it all. If you are making a cluster of 2-3 flowers each strip will be smaller in length to make smaller flowers. The fabric is about 1-1.5 inches wide.


Make a knot at the end of one side of your strip. Try to get as close to the end as possible.....if you dont get it right on the end, just cut off the excess. This knot will be the center of the flower.


Twist the strip a little bit, then glue knot down.


Continue twisting and adding hot glue to anchor the flower to the strip of fabric.


Twist and glue until the flower is the size you want, when it is, cut the strip off.


Take the little piece of fabric and glue it to the underside of the flower.


Now take some felt and cut it slightly smaller then the flower.


Hot glue flower onto hair clip, headband or whatever it's going on.


Then glue felt down to secure it to the clip.


Enjoy....or make some more.


This one will match perfectly with the dress I made parlee for her 1st birthday, but never posted pictures of her wearing the outfit...so here she is on her first birthday, sans the new hairbow ;-)


Love,

Monday, May 10, 2010

Splish Splash Dress

Today I am guest posting at Brown Paper Packages. Leisel has a great blog, if you haven't had a chance to check it out...well I'd suggest you go look...TODAY ;-) Here is the project I made. I think it turned out pretty cute...read the end and see what happened when I was making it though! The Project was part of Leisel's month of Pattern make overs

pmm button


When asked to re-do a pattern, I started to think of what I wanted to make....well, with summer on it's way, we spend a lot of time at the splash pads around our house. So I thought I would work with a pillowcase dress pattern, and turn it into a swimsuit cover dress for my daughter.


With the pillowcase dress pattern, I decided to change it by using a different type of fabric and adding appliques.

Instead of a typical cotton fabric used in a pillowcase dress I used a knit material. (As a confession I have actually never used knit before, and it was much easier then I thought it would be!)

The bottom edge and armhole were a ribbed knit fabric (in the turquoise color). Both the bottom hem and the armholes where made by taking the ribbed knit material and making a bias tape. Need help making bias tape? Check here for help.


Doing something as simple as changing the type of fabric can make a huge difference.

The other change I mentioned was using appliques. The pattern for an applique can be found anywhere, clip art, a free hand drawing, I used my die cut machine to create what I wanted.


The key to using any applique is to remember to use Wonder-Under, especially on knit! The material shifts far too much, you need the Wonder-Under to help stabilize the design, then you can go around and satin stitch around the design......Changing your thread to match each piece of material will give you a much cleaner look.


I loved how easy and cute this simple dress turned out to be. I think that when you have a pattern you love, perhaps you don't need to look at making a major change to it, start simple by changing things like the fabric and adding appliques to your dress!


Summer here we come!


You know, I just cant seem to ever make a project with out something going wrong...and lo and behold this time was no exception.
When I was almost done with the project, I was multi-tasking (always a bad idea) I wrote something with a pen....not realizing it was leaking all over my hand and then picked up the dress...the WHITE dress, and the ink got all over the dress!


AHHH!


I quickly tried to remove the ink (Is that even possible?) All it did was make it seep through to the backside...

So I added some little circle appliques to cover the before mentioned pesky ink stains!

Problem solved!


Love,

Tuesday, April 13, 2010

Parlee's Easter dress


Here is Parlee's Easter dress.


If I could make a pretty 'picture bow' I would have tied the back into a bow


The dress was completely lined. I think lining a dress is actually easier.
Im going to have to make a lined Gidget dress I think it would turn out even better.


I close up of the fabric. I used the same fabric on Joelys jacket and dress, it's a soft toile pattern, perfect for a spring church dress.


The tie is actually sewn on asymetrically, it looks pretty cool when it's on.
And yes, I will take a picture of the kids wearing there new outfits on Sunday.

Can be seen linked to some of these spots

Love,
Monday, April 12, 2010

Reversible headband

Today I made a reversible headband.


I am actually taking my challenge i posted this weekend, of making projects from things you already have around the house....

It only took about 15 minutes to make...so easy!

Here it is with me wearing it....I HATE pictures of myself, but the kids were in school, so I couldn't use Joely...Im sure I'll remove any pictures of me and switch them with her wearing the headband....but until then...

Here is the headband one way


And here is the other side of fabric...

(obviously I cant center the picture either when I am taking one of myself)


easy-peasy mac and cheesy!


Sorry, I didn't add a tutorial. I just used this easy one found here.
Can be seen linked to some sites here

Love,

Wednesday, March 24, 2010

Plaids, Stripes and Motifs...oh my


Bright Fresh Spring colors


What's happening with these bolts of fabric?


You'll see later next month.


But even with all this fabric,
...there still may not be enough!


Any guesses?


Love,

Sunday, March 21, 2010

CTR towel


Choose the Right

I made this simple towel for a very special girl in our ward who was baptized on Saturday.


Using the CTR shield from the primary manual, I copied it and traced the CTR onto a pink flower material that I placed wonder-under on.


I then satin stitched around the CTR and the outline of the shield. I stitched it onto a green flower print fabric. Once it was stitched onto the green fabric, I cut out the shield....added more wonder-under to the underside of the shield.


I then ironed it onto the towel and stitched around the outside of the CTR shield.


I saw this idea, done a little bit differently here. On here site you can download the CTR shield patterns and even a cute baptism poem to add to the pillow. Thanks Rachel for the inspiration!


Love,