Monday, March 29, 2010

Powdered laundry soap


I had a friend who made her own laundry soap....I giggled to myself, knowing I would probably never do that. I really did think it was pretty nest, I just couldn't see myself ever trying it.


...and look at what I just made.


When I saw the recipe, and realized it only had three ingredients, one of which I had TONS of. I once bought many boxes of Borax to make some slime for the kindergartners (not realizing it only takes a teeny bit of Borax)


So here is some homemade laundry soap. I just made the small batch, but I bought stuff to make several more batches.

Powdered Laundry Detergent:
  • 1 cup grated Fels Naptha Soap
  • 1/2 cup washing soda
  • 1/2 cup 20 mule team borax

Mix and store in airtight container or bag.

For light or small loads, use 1 tablespoon. For normal loads, use 2 tablespoons. For heavy loads, use 3 tablespoons.

I found a website that had a breakdown of what it would cost per load...I'm going to trust the amount, as I have no desire to do the math and see if it's right ;-)

Cost per load .15


To make a large batch - grate 6 bars of Fels Naptha Soap and then add 3 cups of Washing Soda and 3 cups of 20 Mule Team Borax. Mix well and store in covered container.


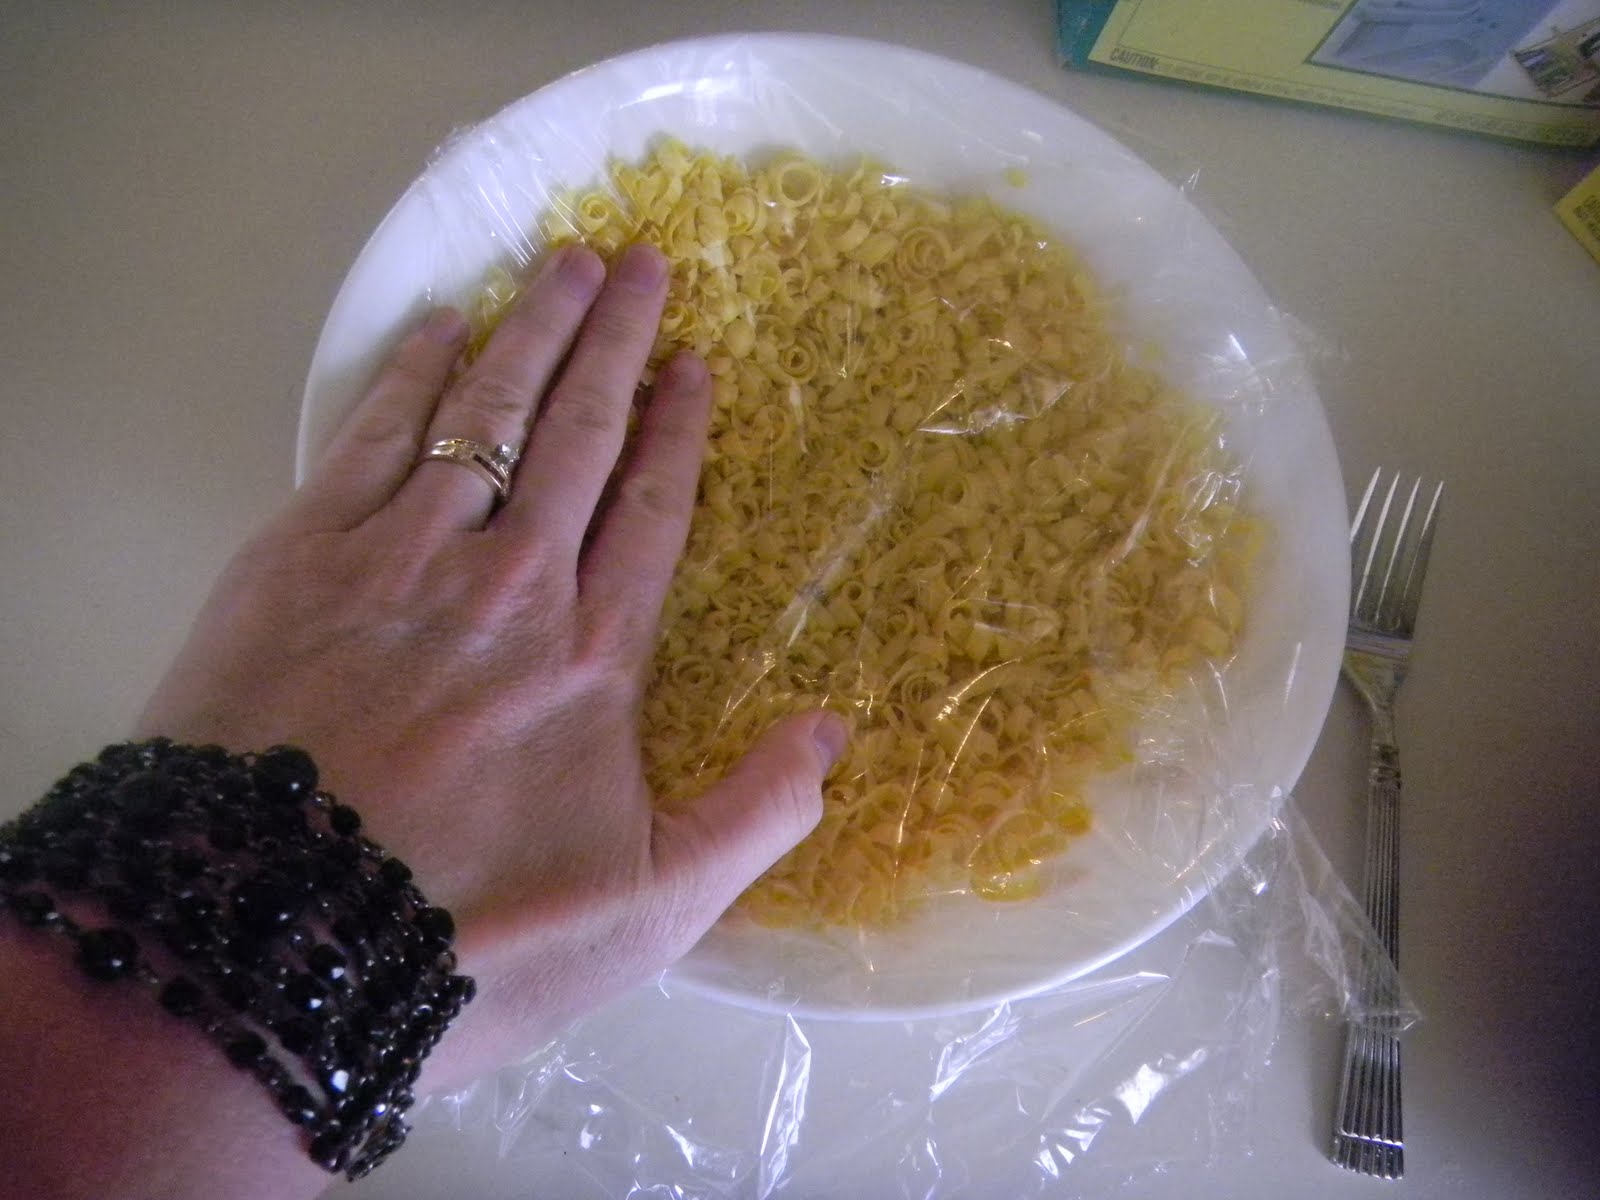
Once I grated the Fels Naptha, I put it in a bowl, put plastic wrap over it and smooshed it down to make it finer. The soap has a warning label to not have prolonged exposure to skin, that's the reason I added the plastic wrap. Also, the Fels Naptha is VERY STRONG smelling...so be prepared!

*After a comment, next time I will put it in the food processor.


mixing, mixing, mixing


My little helper, cutting out vinyl for the new laundry soap container


...and here it is in the cute new container.


I like to link up to some of these spots here

Love,

Thursday, March 25, 2010

Flower bows


Who doesn't love an instantly gratifying project?


Making a simple flower bow is just that project!


I have a drawer with hair clip's, flowers, etc. so if I need to make a quick hair bow I can.
....and isnt that little model so stinkin' cute!

Love

The answer

Remember the bolt of fabric I showed you yesterday....

Well these cute labels, made generously by Susan at sweetwater will be going on the fabric.


It's Trek time in our ward.

Trek is a 3 day 50 mile hike that helps the youth in my church 'mimick' what it must have been like for the pioneers to travel west.

They dress in pioneer outfits, dresses, aprons, bonnets at all.

The pull handcarts.

And sleep under the stars.

It's strenuos and hard. I remember doing it as a youth.


All this fabric will be used to make aprons and bonnets for the 14-18 year old girls.
My mom and I are going to help them sew their own.

And no finished project is complete without a label....or at least that's how I feel now!
So I talked to sweetwater, and these cute little labels were made for them, so that they can remember the

Trek of 2010!

Thanks to Janae, and Barb at Quilted Works for donating fabric....Luckily I didn't have to buy too much.

And Sweetwater for donating labels!

I know the girls at least will be some pretty styling pioneers!

The boys, well they are on there own ;-)


I'll have picture next month, when the girls start sewing up there outfits!

I just wanted to point out two spots for Sweetwater...the place to get labels is here.
Their blog is here....and the link to my post about sweetwater is here.
Love,

Wednesday, March 24, 2010

Plaids, Stripes and Motifs...oh my


Bright Fresh Spring colors


What's happening with these bolts of fabric?


You'll see later next month.


But even with all this fabric,
...there still may not be enough!


Any guesses?


Love,

Spring time cards


I have been in a lucky situation if you ask me....

I am able to stay at home with my kids....however I also am able to do a little side work from home. I work for a lady named Jill. She is a Stampin' Up demonstrator. Actually she is demonstrator #6, and received the bright idea award this year....Here is a link to her site.


Anyhow, I design some of her card's, projects and sewing items.

I LOVE IT!


Here are some snippets of the projects I was working on this week.


And here is my messy desk, see I really get into a groove, and forget to clean up after each project.


I super-d-dooper love anything that is water colored!


Love,

Tuesday, March 23, 2010

Sailboat Shower curtain and towels tutorial


The shower curtain and towel tutorial!

As a warning, there are not very many pictures of the process, but there really doesn't need to be.


Gather your stuff:

I purchased a plain white shower curtain (on sale too) from Target
5 towels
material for the boat:
3/4 yard for the sail's
1/3 yard for the boat
the green I used for the pole and flag I already had, but I'd guess 1/4 yard would be enough.
brown and cream felt (the .25 squares of felt)
wonder-under
coordinating thread (match it as close as you can to your fabric!)

First off.... I found a picture of a sailboat online that I liked I took the pictures that I copied from my computer, brought it to a local copy store and had them copy it onto transperency paper.

I then took the transperency to the library and used the projector to enlarge the image onto the wall.

I traced the image directly onto the back of my fabric, which I had previously added wonder-under onto the back side.

I have no clue who 'Joshua' is in the sailboat picture...remember I chose this picture from something online ;-)


Cut out boat pattern and iron onto shower curtain....take note of the order you add the elements....Pole first, then the boat and sails. I found it easier to lay all the pieces out n the shower curtain, to make sure i liked where they all were. Then I ironed JUST the pole on. I then satin stitched the entire pole onto the shower curtain.

I then repeated the process by adding the boat. Ironing and satin stitching around the entire boat (remember to switch the thread colors as you go so that it matches. I kept white in the bobbin, so that it would be white on the back side like the shower curtain.

Repeat again for the sails of the shower curtain.

Finally I added the port holes on the boat. I simply traced two circles that were the sized I wanted for port holes.


....of course this little logo had to go on the back side of the shower curtain.


The towels:


I had enough scraps with wonder-under still on them to make the towels. I just drew out a simple fish. Cut out the fabric into the fish shape, ironed them onto the towels and then satin stitched them onto the towels.

If you haven't used wonder-under....it is a MUST for this project. It sticks one material onto another so that you can easily stitch around it. I would NEVER recommend doing this without the wonder under.

The shower curtain and the towels were all sewn in one morning. I had prepped the pattern the night before. So a really simple project that could be done in one day!


Here is the link to the original post about the shower curtain and towels.

linked up at my backyard eden, and one pretty thing

Backyard eden also put this as a featured project! Thanks
Make it Yours @ My Backyard Eden


Love,