Showing posts with label tutorial. Show all posts

Monday, September 20, 2010

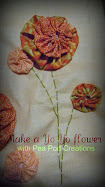
fabric rosette hairbow tutorial


Have you seen the fabric hair bows that are starting to gain some popularity?


Well they are so easy to make.....Easy Peasy in fact!


Start with the fabric you want to use....just about any fabric will work, but if it's shear and thin, plan on possibly getting some hot glue gun burns later on ;-) This sample is cotton.


Rip a strip of fabric, this is the width of the fabric, and I didnt use it all. If you are making a cluster of 2-3 flowers each strip will be smaller in length to make smaller flowers. The fabric is about 1-1.5 inches wide.


Make a knot at the end of one side of your strip. Try to get as close to the end as possible.....if you dont get it right on the end, just cut off the excess. This knot will be the center of the flower.


Twist the strip a little bit, then glue knot down.


Continue twisting and adding hot glue to anchor the flower to the strip of fabric.


Twist and glue until the flower is the size you want, when it is, cut the strip off.


Take the little piece of fabric and glue it to the underside of the flower.


Now take some felt and cut it slightly smaller then the flower.


Hot glue flower onto hair clip, headband or whatever it's going on.


Then glue felt down to secure it to the clip.


Enjoy....or make some more.


This one will match perfectly with the dress I made parlee for her 1st birthday, but never posted pictures of her wearing the outfit...so here she is on her first birthday, sans the new hairbow ;-)


Love,

Monday, May 10, 2010

Splish Splash Dress

Today I am guest posting at Brown Paper Packages. Leisel has a great blog, if you haven't had a chance to check it out...well I'd suggest you go look...TODAY ;-) Here is the project I made. I think it turned out pretty cute...read the end and see what happened when I was making it though! The Project was part of Leisel's month of Pattern make overs

pmm button


When asked to re-do a pattern, I started to think of what I wanted to make....well, with summer on it's way, we spend a lot of time at the splash pads around our house. So I thought I would work with a pillowcase dress pattern, and turn it into a swimsuit cover dress for my daughter.


With the pillowcase dress pattern, I decided to change it by using a different type of fabric and adding appliques.

Instead of a typical cotton fabric used in a pillowcase dress I used a knit material. (As a confession I have actually never used knit before, and it was much easier then I thought it would be!)

The bottom edge and armhole were a ribbed knit fabric (in the turquoise color). Both the bottom hem and the armholes where made by taking the ribbed knit material and making a bias tape. Need help making bias tape? Check here for help.


Doing something as simple as changing the type of fabric can make a huge difference.

The other change I mentioned was using appliques. The pattern for an applique can be found anywhere, clip art, a free hand drawing, I used my die cut machine to create what I wanted.


The key to using any applique is to remember to use Wonder-Under, especially on knit! The material shifts far too much, you need the Wonder-Under to help stabilize the design, then you can go around and satin stitch around the design......Changing your thread to match each piece of material will give you a much cleaner look.


I loved how easy and cute this simple dress turned out to be. I think that when you have a pattern you love, perhaps you don't need to look at making a major change to it, start simple by changing things like the fabric and adding appliques to your dress!


Summer here we come!


You know, I just cant seem to ever make a project with out something going wrong...and lo and behold this time was no exception.
When I was almost done with the project, I was multi-tasking (always a bad idea) I wrote something with a pen....not realizing it was leaking all over my hand and then picked up the dress...the WHITE dress, and the ink got all over the dress!


AHHH!


I quickly tried to remove the ink (Is that even possible?) All it did was make it seep through to the backside...

So I added some little circle appliques to cover the before mentioned pesky ink stains!

Problem solved!


Love,

Binding


Ever wondered how to make your own bias tape?

It's really not hard at all....And since bindings only comes in select materials, knowing how to make your own can be a great thing to learn.

Start by cutting material to the length you need, the width can vary. When I made the 'Splish Splash' dress the arm hole-sleeve binding tape with 3 inches wide.

The hem was cut to 4 inches wide.


I start by ironing the fabric in half the entire length of the fabric.

Next open the fabric back up, this ironed line down the center will act like a guide for you.


Fold the edges up to the center and iron down. Make sure to iron both sides.


Then take the new folded edges and fold in half.
Iron down again.


It's as simple as that....If you are making a binding out of knit fabric, it has a tendency to want to unfold, so pin in place until you are ready to use it on your project. Using starch or even a water spray bottle will help keep your ironed folds nice and crisp.


That's it your done and you have a nice binding for finishing a quilt or finishing an edge of a dress ;-)


Love,

Tuesday, March 23, 2010

Sailboat Shower curtain and towels tutorial


The shower curtain and towel tutorial!

As a warning, there are not very many pictures of the process, but there really doesn't need to be.


Gather your stuff:

I purchased a plain white shower curtain (on sale too) from Target
5 towels
material for the boat:
3/4 yard for the sail's
1/3 yard for the boat
the green I used for the pole and flag I already had, but I'd guess 1/4 yard would be enough.
brown and cream felt (the .25 squares of felt)
wonder-under
coordinating thread (match it as close as you can to your fabric!)

First off.... I found a picture of a sailboat online that I liked I took the pictures that I copied from my computer, brought it to a local copy store and had them copy it onto transperency paper.

I then took the transperency to the library and used the projector to enlarge the image onto the wall.

I traced the image directly onto the back of my fabric, which I had previously added wonder-under onto the back side.

I have no clue who 'Joshua' is in the sailboat picture...remember I chose this picture from something online ;-)


Cut out boat pattern and iron onto shower curtain....take note of the order you add the elements....Pole first, then the boat and sails. I found it easier to lay all the pieces out n the shower curtain, to make sure i liked where they all were. Then I ironed JUST the pole on. I then satin stitched the entire pole onto the shower curtain.

I then repeated the process by adding the boat. Ironing and satin stitching around the entire boat (remember to switch the thread colors as you go so that it matches. I kept white in the bobbin, so that it would be white on the back side like the shower curtain.

Repeat again for the sails of the shower curtain.

Finally I added the port holes on the boat. I simply traced two circles that were the sized I wanted for port holes.


....of course this little logo had to go on the back side of the shower curtain.


The towels:


I had enough scraps with wonder-under still on them to make the towels. I just drew out a simple fish. Cut out the fabric into the fish shape, ironed them onto the towels and then satin stitched them onto the towels.

If you haven't used wonder-under....it is a MUST for this project. It sticks one material onto another so that you can easily stitch around it. I would NEVER recommend doing this without the wonder under.

The shower curtain and the towels were all sewn in one morning. I had prepped the pattern the night before. So a really simple project that could be done in one day!


Here is the link to the original post about the shower curtain and towels.

linked up at my backyard eden, and one pretty thing

Backyard eden also put this as a featured project! Thanks
Make it Yours @ My Backyard Eden


Love,

Monday, March 8, 2010

Week 6....and a look back

Yipee! I made it to the final 5 of SYTYC...My goal has been met! Im even happier that my crafts have had good votes, and usually made it into 2nd place (that way i dont have to write a tutorial) Well, it's time once again to go on over and VOTE.

Here's a look at past crafts...a walk down memory lane ;-)

The food cozy posted here and tutorial here:


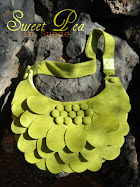
The sweet pea purse shown here:


The sailboat shower curtain shown here: here is the tutorial


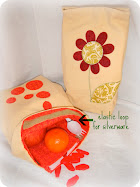
The re usable lunch bag shown here and a tutorial here:


The gidget dress shown here and a tutorial here:


The carseat blanket shown here:


Love,