Monday, September 20, 2010

fabric rosette hairbow tutorial


Have you seen the fabric hair bows that are starting to gain some popularity?


Well they are so easy to make.....Easy Peasy in fact!


Start with the fabric you want to use....just about any fabric will work, but if it's shear and thin, plan on possibly getting some hot glue gun burns later on ;-) This sample is cotton.


Rip a strip of fabric, this is the width of the fabric, and I didnt use it all. If you are making a cluster of 2-3 flowers each strip will be smaller in length to make smaller flowers. The fabric is about 1-1.5 inches wide.


Make a knot at the end of one side of your strip. Try to get as close to the end as possible.....if you dont get it right on the end, just cut off the excess. This knot will be the center of the flower.


Twist the strip a little bit, then glue knot down.


Continue twisting and adding hot glue to anchor the flower to the strip of fabric.


Twist and glue until the flower is the size you want, when it is, cut the strip off.


Take the little piece of fabric and glue it to the underside of the flower.


Now take some felt and cut it slightly smaller then the flower.


Hot glue flower onto hair clip, headband or whatever it's going on.


Then glue felt down to secure it to the clip.


Enjoy....or make some more.


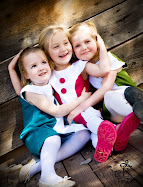
This one will match perfectly with the dress I made parlee for her 1st birthday, but never posted pictures of her wearing the outfit...so here she is on her first birthday, sans the new hairbow ;-)


Love,

Friday, September 17, 2010

Do you ever feel like then just seems to be too much to do? That kind of seems to be my motto. In fact here is what I did with in the last week. It started out in SLC taking the kids on a little vacation and a quick stop by Lagoon.....both girls got sick in SLC and couldn't go to Lagoon....next day I got sick. Decided as long as I'm out of town and sick I may as well start reading The Hunger Games....completely addicted to book. Drive home with my 4 kids, Joel stays in SLC to work (bummer).


Get back home, finish reading The Hunger Games, decide I MUST read book 2 Catching Fire. Read it. Must now read Book 3 Mockingjay. Trying to decide why I haven't read this series earlier, also wondering why I chose to read them all right now, because this week is crazy busy.

Monday: Night I drove home from SLC, got home 11:30 pm. Stayed up till 2:30 to finish Hunger Games


Tuesday: Read Catching Fire, seriously wishing I had more restraint when it comes to books, because I'm in charge of a Relief Society Enrichment night, and we will be doing a Project Runway (way too much fun...pictures later). Im at the church from 4:30-10:30 for Relief Society.


Wednesday: Make Johnny Appleseed costume for Kyler to be in a Parade this weekend.


Thursday: Make Daniel Boone costume for Taran to be in parade also. Get Mokingjay...Read it too.


Friday: Make Parlee a coat for Rodeo- family reunion this weekend too, decide after coat is done, that its WAY to hot in Southern Utah for a coat....Make Parlee a dress, diaper cover and hairbow for Rodeo.


Oh yeah and today is the Parade. Joel will be home tonight, so I do need to clean my house (cruddy!).


Besides this I also went to another wards Relief Society and learned how to make some cool headbands. Made a cupcake holder, worked on a big Stampin' Up get together for next week that I help with every year. Had Kyler start Pre-school. Made sure other 2 kids went to school, did home-work etc. Wondered why Parlee stopped taking her 2nd nap of the day. Wished my husband didn't always work out of town.


So, it seems that I slack on keeping up with this blog....I'm guessing you can see why ;-) However I'm hoping to actually blog about some of the things I've done, and maybe even some of the things I did this summer...I was girls camp director for our ward, so there were tons of fun projects done for girls camp. Last week I also started a kids sewing group at my house. Too much to do!!! But hopefully next week I'll start adding some of these projects onto here! Yipee!


Take Care.


Love,

Wednesday, September 1, 2010

Ender's Game fan trailer

So, I thought I was loading this on my family blog....oops.

Oh well, I came across this for my favorite book, makes me want to read it yet again!!!


This book always wanted to make me name a child Ender, just because the book is so awesome....funny thing is that I now live close to a guy who has that name. Must be a great book to others too! :-)
Love,

Friday, July 23, 2010

how to make casings

This is the post I have today on Pickup some Creativity, for the sewing 101 series.

What's a casing?
And how in the world to I make one?


I've totally asked myself these very questions when I started sewing....don't you just love when you are reading a tutorial and you think to yourself "I'd really like to make that, but I don't even understand the terminology?"

Hopefully, this little post can help you out with that.

First off.....What IS a casing?

Well, a casing is a channel made in a piece of fabric for inserting elastic or a drawstring. A casing can be made by turning the edge of the fabric over and sewing it down at a specific distance from the edge or by applying another piece of fabric such as bias tape to the desired location. Casings are frequently used at garment waistbands and cuffs.

The first time I used a casing (that I can think of) was to make simple pillowcase dresses....You need a casing at the top of the dress to thread elastic through.

I've also used casings every time I make a waistband in a skirt or pair of pants.

.....SO.....how do you make a casing?


Simple.

This can be altered to fit any size 'tube' you need. (You know, so a cuff can be smaller, and a waistband can be wider)

1. Determine how wide you need your tube to be.
If I was adding a 1/2 inch or ribbon or elastic through my casing I would need to make sure my 'tube' was just a little bit bigger then that. By having it a little bigger the ribbon or elastic can lay flat in the tube....Bunchy elastic is NOT so good ;-)....That being said if the 'tube' is too big the elastic or ribbon can turn and twist in the 'tube'.

2. Start by folding the fabric over one time.
The first fold can be a little less then the desired amount....For example, if Im still adding my 1/2 inch elastic, then my first fold would be about a 1/3 inch.


3. Iron down....Why? because it just makes things easier! Trust me.

4. Fold over again.
This time fold down about 3/4 inch over. (This fold needs to be bigger then the elastic or ribbon). Why did I fold it over twice? because now the raw edge (or edge that frays) will be nicely inside the tube, and you wont have to worry about your material fraying when you wash it!


5. Iron down...again!


6. Now you need to sew down close to the folded line.
Keep it close to the fold, and keep it even.


7. CONGRATS YOU ARE DONE!

Now add your ribbon or elastic through the tube


hmmm....not so sure how you are going to get that piece of elastic through that little teeny tube? Add a safety pin to one end of the elastic, it makes it a lot easier to thread the elastic through.


Thursday, July 8, 2010

Sewing 101

My friend Chris at Pickup Some Creativity is doing some posts on basic sewing. SHe has asked me to be a guest blogger....so I guess I better start figuring out what in the world I am going to talk about. Any ideas?


Love,

Friday, July 2, 2010

Patriotic Kimono Dress


My little baby girl will be 1 on Saturday....Yes, I am wiping away a tear when I think of how fast the last year went.


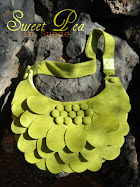
For her birthday, I found this adorable and easy to sew pattern on Heidi and Finn. It really was as easy to sew as they say! I decided to go with the appropriate Patriotic theme. The dress is reversible, which is pretty sweet!


On one side I added the USA logo, and on the other side I put my Pea Pod label. Both were from Sweetwater

See at some spots posted here

Love,
Thursday, July 1, 2010

Bright Summer Fun


Does anything say summer more then tie dyed shirts?


I didn't think so either, so this was what we did as a family.


We chose to dye the shirts out front on the lawn (very good choice). I was actually surprised at how little my kids dyed themselves, I visualized dye everywhere.

Love,

Thursday, June 3, 2010

Trek Time


I haven't been posting much lately....that's just because I have been enjoying lots of family time!

Today I woke up at 5:30, met up with a group of people at 6:30am, and dropped my husband off to do the TREK with the youth in our ward. Trek is a three day hike, where they act like the early pioneers who crossed the plains.
Everyone is supposed to dress trek appropriate: Dresses, bonnets, aprons and pantalooms for the girls. Boys wear long sleeve shirts, hats and suspenders....The real kicker is that EVERYTHING they pack, must be packed in a 5 gallon bucket. And let me tell you there is not a lot of room in one of those buckets!!


My mom and I helped the youth make bonnets and aprons. They all did so great!


Many of the items to make the bonnets and aprons look so great were donated! So a huge thank-you to.....

Sweetwater for the great labels! The girls LOVED them!!!! Here is a link to there etsy site.


Quilted works for donating some of the fabric....I need to find a current site for them to link too.
Other fabric was donated by a dear friend, leaving not too much to have to bought by my mom and myself!


Love,