
Perfect for friends.....

Perfect for playing.....

Perfect for hugging.....

The Gidget dress is easy enough for a beginner. Made from linen, it lightly flows and is the perfect breathable fabric for spring and summer!
And as long as you are making one dress, you may as well make three so all the friends can match!
Made from a simple a-line dress. I will show you how I designed and made these simple dresses using clothes you own as a pattern OR by cutting up a cheap pattern to re-design your own.
These dresses have coordinating fabric buttons on the front (which I made with the linen from the dress). This dress also has a simple button down back that DOESN'T use button holes...So if you have been intimidated by button holes, there is no excuse to not make your own Gidget dress!
...............so lets get sewing...................
Make a simple drawing of what you visualize for your dress.

Yes, this is all I did for a dress drawing ;-)
I bought a simple a-line pattern in the size I need. I made one for my daughter and simply used a onsie as a guide for the neck and arm holes. Adding an inch for sewing and ease of wearing.....However for the contest I decided to make dresses for my friends toddlers, not having little girls that age and not having there clothes to use a s measurement, I went with a cheap pattern from the store so that I could have a decent arm, neck and length measurements.
I then cut out the pieces and drew out how I needed to additionally cut up the pattern. This pattern (along with one I made for my daughter) both had three simple pieces. One front piece, which is really half of the front, then placed on a fold and cut, so that each side ends up identical. This is a picture of the front piece from the pattern.
I am showing pieces from the pattern, because for the girls I bought a simple pattern and cut it up...remember the first time I made this dress I designed my own pattern, this will just show you aprox. how each piece should look.

It also had two back pieces....these were identical pieces. But I need them in two seperate pieces so that I could add buttons later. These three pieces were the basic dress. The back pieces were left as they were and only the front piece was altered.
Here is a simple picture of the back piece...remember you will be cutting two pieces

The front piece: I drew a line that ran parallel with the center line that would be placed on the fold of the fabric. the line was aprox 2 inches from the fold I followed this up then made a swoop and headed for the arm hole with the line. This picture shows the pattern once it was cut up

This line would represent the colored and white fabric areas. I cut along the line and now had two pieces.....However, I would need to cut out four pieces. I doubled the white fabric as the linen was thinner in the white. So that accounts for two pieces, then I needed to cut out two of the colored fabric areas. One for the left and one for the right side.


Here are some photos of the little Gidget dress I made for Parlee...notice I simply used a onsie to get the basic lines for the neck and arm holes, the rest of the dress is simply free form. just make sure you add room for sewing and ease of wear.


Sew (I serged my pieces, if using a regular machine add additional width to your fabric and make sure you cover raw edges) new front pieces together and iron (iron seams towards the darker fabric)
Now that you have a NEW front piece, set it aside.


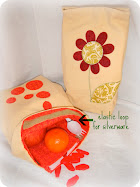
To do the elastic button closure. Check out my other post here.
* from this point you can follow the normal directions for putting together an a line dress.
1) with right side together stitch dress at shoulders and side seams
2) press and sew neck and armholes, I added a simple cap sleeve at this point.
3)Stitch up hem of skirt
Fabric buttons are TOO fun. I used 1 1/8th inch cover buttons from the store. I only recently tried using fabric buttons, my first attempt was on the 'SWEET PEA' purse. I loved that I could have perfectly matching buttons. Well, on this project I bought some larger cover buttons, made them, and added them to the front for some added drama.
*You could easily add a zipper to the back if you would rather. I have now made this dress with both the zipper and easy button closure.
Have fun with this dress and if you make one please send me a picture, my email is posted on my blog here. Id love to see your Gidget dress!

Love,


Just found your blog thru Adventures in dress making.Beautiful dress
ReplyDeletesorry not adventures in dress making it was Brown paper packages.
ReplyDeleteit's beatiful, so cute.
ReplyDeleteThis looks fantastic, but not sure if im quite up to making my own patterns? however i like your thinking so first i might try making a basic aline dress and add some top stitching design then give your dress a go! I love how you altered a dress pattern to suit your own style that is the reason i wanted to learn to sew to alter clothes to suit myself!! thanks for the inspiration Kerrie
ReplyDelete